
 Ajmal Muhammad P
 Here is a simple Java Editor developed in Java Development Kit (JDK) version 1.6.0.It is a small program of less than 1MB size that lets you perform the following functions:
1. Edit the Java source and project files
2. Compile and run the Java source and project files
3. Create the executable ‘.jar’ Java file
4. Create an installer file
Download application here.
The editor supports files with ‘.java’ and ‘.jwc’ extensions. The java file is a single Java file and the jwc file is the Java project file. You can compile both java and jwc files with the help of this editor. The project file has the facility to create the executable jar file. When a java file is compiled, the class output file is stored in the same source folder. In the case of a project file, the source file and class file are stored in different folders.
Software program
The editor is created using Java programs having 64 class files. It has a menu bar and toolbar created by menucreater.class and toolbarcreator. class files, respectively. It also has a user-defined toolbar that can be used to run external files. The toolbar can be customised using ‘customise’ button provided in the editor window.The editor. The editor uses JPath .inf and usertool.inf files. The JPath.inf file is used to store the data such as JDK directory and the last used path.The usertool.inf file is used to store the name and path of the customised tools. The icon for the editor is stored inside the executable JGuider.jar
file.

‘JtabbedPane’ function in the Jguider.java file helps you to manipulate all the project files at same time. You can open up to 30 files in the editor window.Editing the Java source file. The Java source file can be easily edited using this editor (refer Fig.1). If you already have a Java source file, simply drag it to the editor screen and start editing. This editor provides the option for creating ‘OptionPane’ easily as per your requirement. For this, click Menu Bar→Tools→OptionPane to open the OptionPane creator window. Selecting the appropriate options from this window creates a new line of code in the current editor screen. This code creates a particular type of ‘JoptionPane’ in your application.
Add dragging option with the help of the FileDrop.java file. The FileDrag( ) method along with the JtextArea function in ‘Jguider.class’ helps to access the location of the dragged file. The SetFile( ) method in ‘JGuider.java’ helps to open both the java source file and the jwc project file in different modes.
The main class (Jguider.class) is interfaced with ‘Runnable’ to check file modification. The checkfilemodification() method checks any modification or change done in the code. The createbat( ) method in the JGuider.java file is used to create a compiler.bat file each time on execution. This compiler.bat file has the code for compiling, running,creating the jar file, registering the file type, etc.
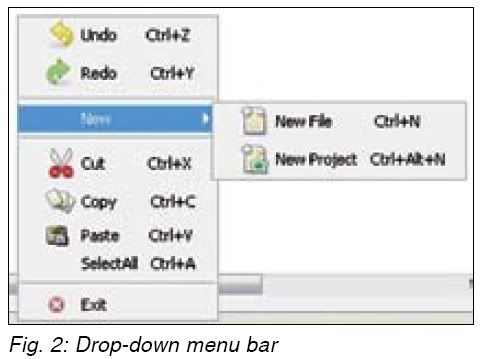
‘PopupMenuCreater( )’ in ‘JGuider.java’ helps to create the popup menu while right-clicking the mouse button inside ‘Jtextarea’ of the editor (refer Fig. 2).The Menucreater subclass inside the main Jguider.class is used to create the main menu bars on the top of the editor screen. It includes menu items for all the functions of the editor.Almost all the buttons and menu items have separate ‘ActionListeners’ in ‘Jguider.class.’ The icons for the menu items can be added as
follows:
JMenuItem JOP = new JMenuItemThe next important class is ‘Tool-Barcreater’ in ‘Jguider.class’ that creates the toolbar. The toolbar includes buttons for important functions.
(“OptionPane”,new ImageIcon(getclass().getClassLoader().getResource(“pic/JGuider/opi.gif”)));

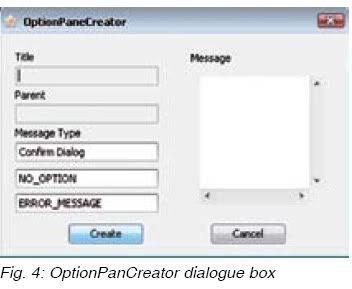

‘OptionPane’ under ‘Tools’ menu is created using the OptionPaneCreator.java file. It creates code for the JOptionPane interface (refer Figs 3 and 4).‘JoptionPane’ makes it easy to pop up a standard dialogue box in your application that prompts users for input and output or display message.The user tools can be used to manipulateany type of external file. For example, when you click ‘Customise’ button to import a ‘.jpg’ file, a dialogue box opens (refer Figs 5 and 6).Browse the jpg file and click ‘User Tool 1’ option followed by ‘Save’ button. Close the dialogue box and click the leftmost tool icon to open the jpg file on the editor
screen.
Java project: The project section is used to create the Java projects so that you can create the executable jar file.A project file can be created by clicking ‘New Project’ in the pop-up menu. After creating the project, you can add new classes by pressing ‘CTRL+ALT+C’ keys.The executable jar file for your project can be easily created by ‘Create Jar’ button under ‘Tools’ menu. While compiling the project (press F7 or click ‘build’ button),all the Java files in ‘src’ folder are compiled and classes folder is generated as the output.
Project settings: This dialogue box allows you to select the options for
the main class and class path of the project (refer Fig. 7). All the files inside ‘src’ folder are added to the ‘Main-Class’ combo box. You can choose the main class from there.The next is the jar file option. The names of the files inside the ‘classes’ directory and the relevant files to be included in the executable jar file
are mentioned here. You can select the files by clicking ‘Select’ button in ‘Project Setting’ window. You need to click the corresponding check box either to include only class files or all all the selected files. You can save data by clicking ‘Finish’ button or cancel by clicking ‘x’ button. The ‘Class Path’ field under ‘Project Setting’ dialogue box is used to set the directory of the package used.
Compiling and running:Both the single source and the project files can be compiled and run using ‘Run’ button in ‘Build’ menu. The processing information of the compiled file is displayed in ‘Build Output’ window.(refer Fig. 8). The result of the executing file is displayed in another window (refer Fig. 9). Note that compiling and running the program requires javac.exe and java.exe files,respectively,
of JDK 1.6.0. Access the external JDK files using the following code given in
Jguider.class:
Runtime.getRuntime().exec(“Java filename”)Invoke the action of the external file
by the code:
Process p = Runtime.getRuntime().The external file returns the compiled data. So the above code reads the data from the editor and outputs it in
exec(“command”);
while ((String temp = cmdIn.readLine()) != null) OutPutField.append(temp+”\n”);
‘Build Output’ window.
Creating executable Jar file:The executable jar file can be created only if it is a jwc project file. The manifest.txt file inside the classes folder is used during generation of the executable file. It defines the main class and the splash screen for the executable file. This mainfest.txt file is included
automatically in the project folder when creating a new project. The steps for creating the executable jar file are given in the testing procedure section.
Creating the installer file: The installer is a simple self-extracting jar file that can be used to archive all the files of the project and the user can install the project to a particular folder or PC.
Put the project folder under ‘Your Folder’ option in the Jpackager window (refer Fig. 10) along with the licence file (if any). ‘Build’ button is provided to create the installer for your application. The setup.jar file is generated in the project directory. It is nothing but a self-extracting file. Clicking the setup.jar file installs all the project files in your system.
Testing procedure
1. Double-click the JGuider_Setup.jar file provided in the EFY-CD. This opens an installation window. Follow the instructions, choose proper location for file installation and click ‘Next’ button to complete installation.By default, ‘Jguider’ folder is installed under ‘Program Files’ in your system.
2. Install JDK 1.6.0 and click ‘Jguider.exe’ under ‘Jguider’ folder to open the editor. Provide the path of the JDK1.6.0 folder when prompted. By default, you can see the ‘untitled.java’ source file in the editor window.
3. Compile the ‘untitled.java’ file using ‘build’ option.
4. Execute the program by clicking ‘Run’ menu. You should see output text on the screen.
5. To create a jar file, create a project folder say, efy1, and compile it
with ‘build’ option. Now under ‘efy1,’ three files (efy1.jwc, classes and src) are generated. Click ‘Create Jar’ option under ‘Tools’ menu. An efy1.jar file is generated under ‘classes’ folder in ‘efy1’ folder.
6. To create an installer, just select Tools→Installer→Packager options.‘Jpackager’ window opens up. Follow the steps explained in ‘creating the installer’ section to generate the setup.jar file.
EFY note:All the relevant files of this project have been included in this month’s EFY-CD and are also available on www.efymag.com website.
No comments:
Post a Comment